9. 常见部署方式

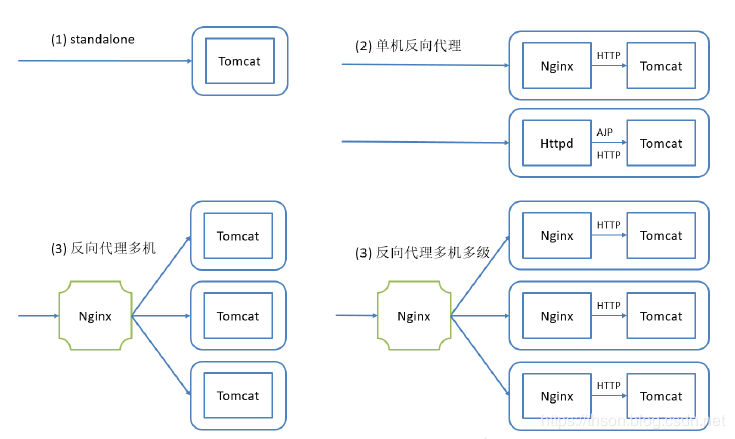
- standalone模式:Tomcat单独运行,直接接受用户的请求,不推荐。
- 反向代理:单机运行,提供了一个Nginx作为反向代理,可以做到静态有nginx提供响应,动态jsp代理给Tomcat
- LNMT:Linux + Nginx + MySQL + Tomcat
- LAMT:Linux + Apache(Httpd)+ MySQL + Tomcat
- 前置一台Nginx,给多台Tomcat实例做反向代理和负载均衡调度,Tomcat上部署的纯动态页面更适合
- LNMT:Linux + Nginx + MySQL + Tomcat
- 多级代理
- LNNMT:Linux + Nginx + Nginx + MySQL + Tomcat
10. Nginx和Tomcat实践
10.1. nginx 反向代理 tomcat
- 从epel源安装nginx
yum install nginx -y
- 安装jdk
yum install java-1.8.0-openjdk-devel -y
- 下载tomcat
yum install wget -y
wget http://mirrors.tuna.tsinghua.edu.cn/apache/tomcat/tomcat-8/v8.5.42/bin/apache-tomcat-8.5.42.tar.gz
链接失效就去官网:http://mirrors.tuna.tsinghua.edu.cn/apache/tomcat/tomcat-8
- 解压
tar xf apache-tomcat-8.5.42.tar.gz -C /usr/local/- 软链接
cd /usr/local/
ln -s apache-tomcat-8.5.42 tomcat
- 创建用户tomcat
useradd -r tomcat
- 添加域名解析
vim /etc/hosts
127.0.0.1 node1.com
- 创建页面
echo '<h1>tomcat node1 page from nginx !</h1>' > /usr/local/tomcat/webapps/ROOT/index.html
- 创建jsp
vim /usr/local/tomcat/webapps/ROOT/myindex.jsp
<%@ page language="java" contentType="text/html; charset=UTF-8"
    pageEncoding="UTF-8"%>
<!DOCTYPE html>
<html>
<head>
    <meta charset="utf-8">
    <title>myapp of magedu</title>
</head>
<body>
    <h1> test jsp in default ROOT dir for node1 ! </h1>
    <%
    out.println("hello jsp");
    %>
</body>
</html>
- 设置权限
chown -R tomcat.tomcat /usr/local/tomcat/
注意最后要有
/
- 配置 nginx 实现反向代理
vim /etc/nginx/nginx.conf
...
http {
...
    server {
...
        location / {
        proxy_pass http://node1.com:8080;
        }
...
- nginx检查语法并启动
nginx -t
- 启动 nginx 和 tomcat 进行测试
su - tomcat -c '/usr/local/tomcat/bin/startup.sh'
systemctl start nginx
systemctl enable nginx
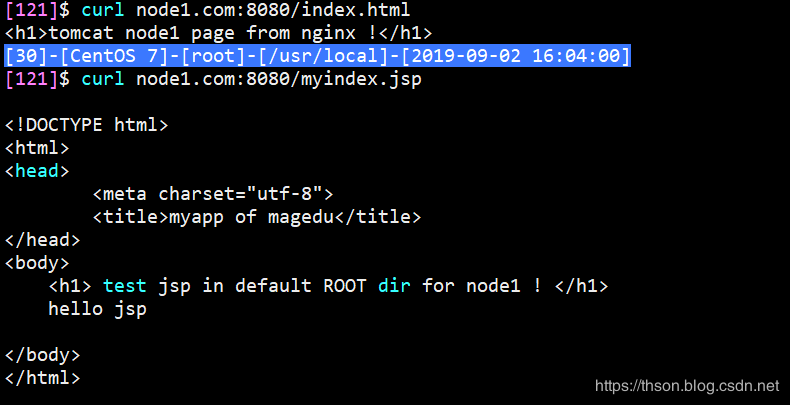
- 测试
没代理
curl node1.com:8080/index.html
curl node1.com:8080/myindex.jsp
走nginx代理
curl node1.com/index.html
curl node1.com/myindex.jsp

- 查看日志
# cat /var/log/nginx/access.log
192.168.99.121 - - [02/Sep/2019:16:07:28 +0800] "GET /myindex.jsp HTTP/1.1" 200 190 "-" "curl/7.29.0" "-"
192.168.99.121 - - [02/Sep/2019:16:07:34 +0800] "GET /index.html HTTP/1.1" 200 40 "-" "curl/7.29.0" "-"
10.2. 基于 nginx 反向代理实现动静分离
- 修改配置文件
vim /etc/nginx/nginx.conf
location / {
    index index.html;
}

location ~* \.jsp$ {
    proxy_pass http://node1.com:8080;
}
- 把静态页面移动到nginx目录下
mv /usr/local/tomcat/webapps/ROOT/index.html /usr/share/nginx/html/
- 重启 nginx
systemctl restart nginx
- 进行测试
curl node1.com:8080/index.html
curl node1.com:8080/myindex.jsp

curl node1.com/index.html
curl node1.com/myindex.jsp
访问node1.com:8080/index.html的时候会报错
10.3. httpd 反向代理 tomcat
1.在上一个实验的基础上,卸载 nginx 服务器,安装 httpd
systemctl stop nginx
yum install httpd -y
- 创建配置文件
vim /etc/httpd/conf.d/tomcat.conf
<VirtualHost *:80>
    ServerName          node1.com
    ProxyRequests       Off
    ProxyVia            On
    ProxyPreserveHost   On
    ProxyPass         / http://127.0.0.1:8080/
    ProxyPassReverse  / http://127.0.0.1:8080/
</VirtualHost>
echo 'tomcat static page by httpd !' > /usr/local/tomcat/webapps/ROOT/index.htmlBashCopy- 启动
systemctl start httpd
- 查看端口
# ss -tnl
State       Recv-Q Send-Q Local Address:Port               Peer Address:Port
LISTEN      0      128       *:22                    *:*
LISTEN      0      100      :::8009                 :::*
LISTEN      0      128      :::80                   :::*
LISTEN      0      100      :::8080                 :::*
LISTEN      0      128      :::22                   :::*
LISTEN      0      1      ::ffff:127.0.0.1:8005                 :::*
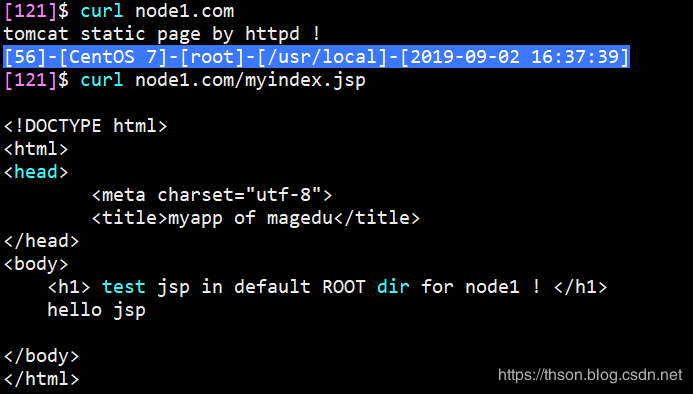
- 测试
curl node1.com
curl node1.com/myindex.jsp

10.4. httpd 使用 ajp 协议反向代理 tomcat
上一小节中,我们使用 httpd 通过 http 协议反向代理 tomcat,由于 httpd 还支持 ajp协议,下面我们演示一下 使用 ajp 协议反向代理 tomcat 服务器
- 修改 httpd 虚拟主机的配置文件
vim /etc/httpd/conf.d/tomcat.conf
<VirtualHost *:80>
    ServerName       node1.magedu.com
    ProxyRequests    Off
    ProxyVia         On
    ProxyPreserveHost    On
    ProxyPass          / ajp://127.0.0.1:8009/
</VirtualHost>
- 重启httpd
systemctl restart httpd
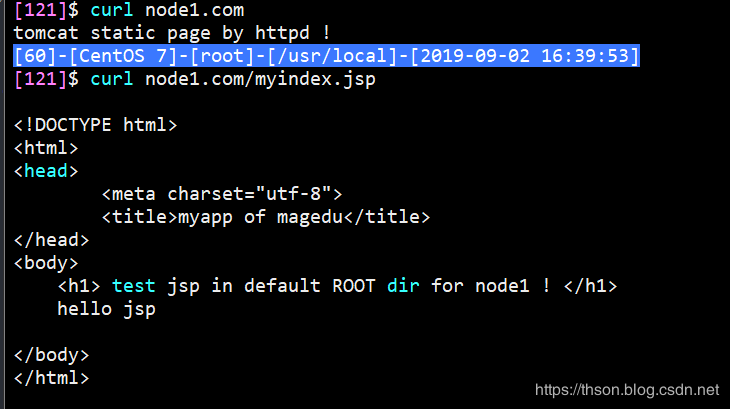
- 测试
curl node1.com
curl node1.com/myindex.jsp
